Products
Manual Grafting Tool
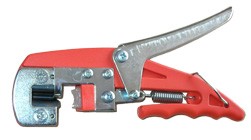
The manual grafting tool sold by Eclipse Enterprises is ideal for multiple grafting applications. Manufactured in Italy for the professional horticulturist, the manual grafting tool features different blades for Omega, slot and bud grafting and has a robust metal and hard plastic construction for tool longevity.
Technical Information
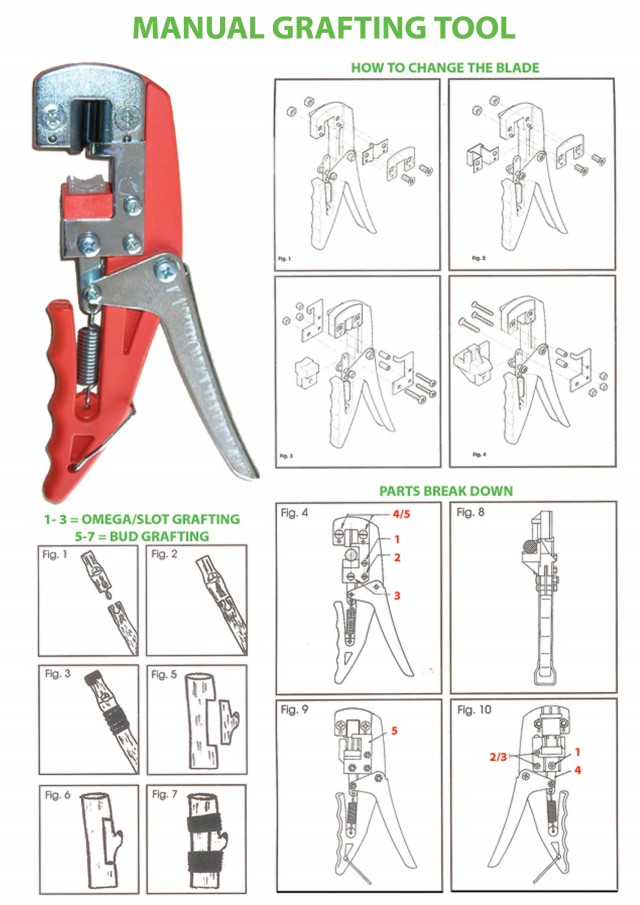
Note: Please download .pdf file for corresponding figures.
INSTRUCTIONS FOR OMEGA/SLOT GRAFTING:
- Place the branch or stem of the plant that is to be grafted into the cutting holder (fig.4).
- Press the lever hard to perform the cut. The cut must be sufficient to separate two parts completely (fig.1).
- Never tear away any uncut bark.
- Cut away from the good part of the plant (the scion) a graft with 1-2 buds and insert it into the host plant in the section, which has just been cut to shape (fig.2).
- The hollow part of the cut must always be in the host plant (fig.1).
- In the grafted scion the cut must be approximately 10mm from the bud (fig.1).
- After having fitted the two sections tightly, bind the graft with a strip of “raffia”, adhesive paper or Teflon etc (fig.3). Cover the end of the graft with paraffin melted at a temperature of 80°C or bind it with the materials indicated above.
HOW TO CHANGE THE BLADE:
- Loosen screws 1, 2 & 3 on the mobile carriage (fig.4).
- Completely unscrew screws 4-5 and the blade holder.
- Once the blade has been replaced, repeat the above operations in reverse order.
INSTRUCTIONS FOR BUD GRAFTING:
- Place the branch or stem of the plant that is to be grafted into the cutting holder (fig.8). Check that the bud is at centre of the external blade.
- Press the lever hard to perform the cut. The cut must be sufficient to separate the two parts completely (fig.5).
- Cut the bud away from the good part (the scion), then perform the same operation on the plant to be grafted (mother or wild plant) and insert the cut bud into the notch of the wild plant (fig.6).
- After having fitted the two sections tightly, bind the graft with a strip of “raffia”, adhesive paper or Teflon etc (fig.7).
HOW TO CHANGE THE BLADE:
- Completely unscrew screws 1, 2 & 3 on the moving carriage (fig.10).
- Completely remove the grafting cushion, separating the various parts.
- Following the instructions given above for Omega/Slot grafting, change to the “T” style blade.

